How to Manage Subscriptions with SendBlaster Using a Subscription Form
We often receive questions like this: “I want to add a web form on my site to collect email addresses. What do I need to do to manage those subscriptions?”
Actually, managing subscriptions with SendBlaster is pretty simple and easier that you think. It just requires a few steps to get started, but after that everything will be processed automatically.
First of all, choose one of the free scripts based on your preference (single opt-in, double opt-in, for websites in ASP or PHP language, etc.) and follow the instructions on how to implement the script on your website.
One important thing that you should keep in mind is that the mailing list you are going to create should be associated with a specific email address (we call it managing the email address). You can choose to use a dedicated address for each list you own or use the same addresses for multiple lists. In this case, when one list is updated, all other lists that use the same Subscribe/Unsubscribe address will also be updated.
For our example, let’s use “newsletter@mywebsite.com” as the email address that will gather all new subscriptions from our website. You can use any email address you own, but make sure that it has the capability to download messages using the POP3 protocol.
Once you have successfully published the script on your website, you will need to “connect” it to SendBlaster in order to download all new subscriptions (and cancellations).
In fact, every time a user fills out and sends the subscription form on your website, an email message with “subscribe” in the subject line is sent to the managing email address.
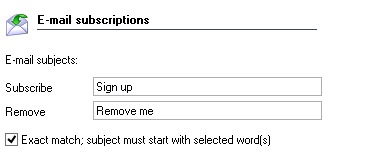
Default subject lines are Subscribe for subscriptions and Unsubscribe for cancellations. But they can be changed based on your preferences. Simply go to the Advanced Settings panel and enter the new email subjects in the email subscriptions section. In the example below we have changed them to “Sign up” and “Remove me”.
To download new subscriptions from your subscription form, click on Manage Subscriptions in the left side bar of SendBlaster, then select the distribution list related to your website and enter all details regarding the email address you want to use to gather subscriptions and cancellations. Click on Connection Test and if everything is correct you should get the “Connection established” message.
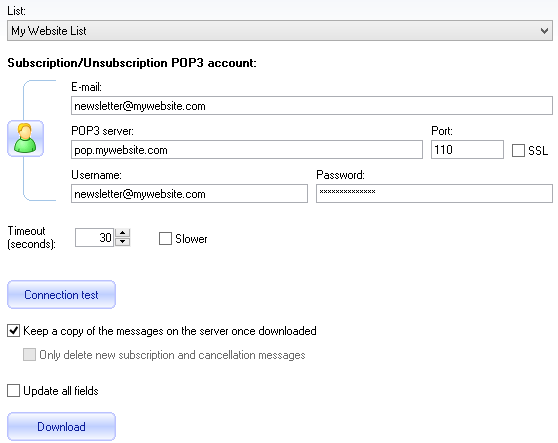
In certain hard to predict circumstances, your POP3 server may slow down the downloading of messages. If you are experiencing difficulties, you may want to try enabling the Slower checkbox.
Furthermore, by checking Keep a copy of the messages on the server once downloaded, SendBlaster will download new messages without deleting them from the server. The messages will then be available for future use. New messages will be ignored.
In the subcription panel there is also another available option called Update all fields. This is an extremely powerful option: when checked, not only the email subject but the entire message body will be processed. If the message body contains fieldname: value lines, not only the contact record’s email address but the other fields will be updated as well. We recommend checking this option only when you really need it because it may slow the entire process down.
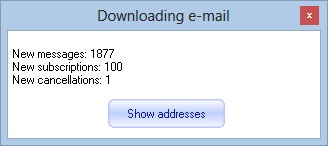
When you are ready, click on the Download button. All new subscriptions will be downloaded, and the selected distribution list will be updated.
If the download of new messages appears to be rather slow, this might indicate that many messages have piled up on the email server. If this happens, disabling the Keep a copy of the messages on the server option should help. After this option has been disabled, simply click on Download. The messages, once downloaded, will be removed from the server and future downloads should be faster.
The unsubscribe process works very much like the subscribe process.
The same email address you have configured to manage subscriptions will also be used by SendBlaster to manage cancellations.
Every time a user requests to be removed from your list, the managing email address receives an email message with the subject line “Unsubscribe”.
To download all new cancellations, you will need to run the tool for subscriptions that we have shown above. Once you are done, the related distribution list will be updated and all email addresses will be automatically unsubscribed.
If you are using the same management email address to receive other messages, it is a good idea to select the option Only delete new subscription and cancellations messages. This way SendBlaster will process only messages that are recognized as subscriptions or cancellations.
After you have successfully installed a subscription form on your site, we recommend that you download new subscriptions (and cancellations) regularly in order to have a clean and updated email list.