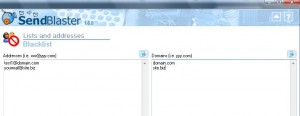
When a recipient requests to be unsubscribed, you should change his/her subscription state. SendbBlaster gives you a second chance: the “blacklist” feature.
Blacklist is a filter that prevents certain e-mail addresses or domains from receiving mails, independently from their subscription/activation state.
How does it work?
When you send a message to a given list, before each mail is actually sent, Sendblaster checks whether the recipient’s address or domain is included in the blacklist: if it is, that mail is skipped and a “blacklisted” message will be shown in the log panel.
You can setup two different blacklists:
- Addresses blacklist: all these e-mail addresses will never receive a mass emailing
- Domains blacklist: no address belonging to that domain will ever be sent a message.
There are three ways to fill these blacklists:
- as free text. Be sure that each row contains one address / domain.
- copy to / paste from the clipboard, in order to manage blacklists with third party software
- by pressing Edit with Notepad button to open a blacklist with Windows’ built-in text editor. In this case program execution stops until you finish editing and close Notepad.
Here is an example of a valid addresses blacklist setup
test1@domain.com
yourmail@site.biz
and a valid domains blacklist:
domain.com
site.biz

Please remember to avoid wildcards (”*”) and third level domain names (”www.”):
www.domain.com
*@site.biz
